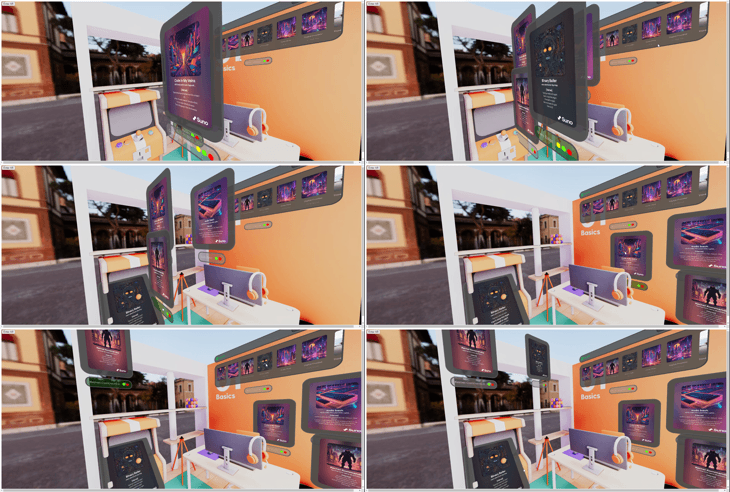
MusicPlayer Tutorial

Creating a 3D Music Player with SpatialJS
This guide will walk you through creating a 3D music player using SpatialJS, React Three Fiber, and related libraries. We'll create a spatial interface with windows for controls and visualizations.
GitHub Repo: SpatialJS Music Player (opens in a new tab)
Live Edit: Try it on CodeSandbox (opens in a new tab)
Installation
First, install the necessary dependencies:
npm install @spatialjs/core @react-three/fiber @react-three/xr @react-three/uikit react threeSetting Up the Basic Scene
You can setup a basic scene with a 3D environment and windows using the @react-three/drei library.
import React, { Suspense } from 'react';
import { Canvas } from '@react-three/fiber';
import { WindowManager } from '@spatialjs/core';
import { OrbitControls, Environment } from '@react-three/drei';
import { ambientLight, directionalLight } from '@react-three/fiber';

const App: React.FC = () => {
  return (
    <div style={{ width: '100vw', height: '100vh' }}>
      <Canvas>
        <OrbitControls
          enableZoom={true}
          enablePan={true}
          rotateSpeed={0.5}
          minPolarAngle={Math.PI / 2}
          maxPolarAngle={Math.PI / 2}
        />
        <Environment preset="sunset" background />
        <ambientLight intensity={0.5} />
        <directionalLight position={[5, 5, 5]} intensity={0.5} castShadow />
      </Canvas>
    </div>
  );
};

export default App;
Setting Up Music Player Window Component
Create a new file called MusicPlayer.tsx and set up the basic component:
import React from 'react';
import { Container, Text } from '@react-three/uikit';

const MusicPlayer: React.FC = () => {
    return (
        <Container>
            <Text>Music Player</Text>
        </Container>
    );
};
export default MusicPlayer;
Creating Windows
Now, let's create windows for our music player components. First let's see creating the simple Music Player Window.
Start with adding the Window Manager to the scene:
import { WindowManager } from '@spatialjs/core';Now add it to the scene inside the <Canvas> tag:
<WindowManager />To add the window to your scene, you can use the hook useWindowStore or the createWindow function to create windows when you think they should appear. The simplest form of that is to add it in when the R3f application starts using the useEffect hook in React:
useEffect(() => {
    createWindow(MusicPlayer, {
      title: 'Music Player',
      width: 400,
      height: 400,
      disableBackground: true,
      disableTiling: true,
    });
  }, []);
Now you can see the window in the scene. But we want to create the full music player interface. You can grab an Album Array from the example or create your own.
Let's create a simple array of albums:
const albums = [
   {
      name: 'Code in My Veins',
      artist: 'Deamoner',
      cover: 'https://cdn2.suno.ai/image_c7b46b4d-4ac2-41f6-b8ed-10096e69850d.jpeg',
      audio: 'https://cdn2.suno.ai/audio_c7b46b4d-4ac2-41f6-b8ed-10096e69850d.mp3',
      video: 'Code in My Veins.mp4'
    },
    {
      name: 'Sudo Bash',
      artist: 'Deamoner',
      cover: 'https://cdn2.suno.ai/image_39ef534d-e9f4-4db5-8f82-22d2b2edaa35.jpeg',
      audio: 'https://cdn2.suno.ai/audio_39ef534d-e9f4-4db5-8f82-22d2b2edaa35.mp3',
      video: 'sudo bash.mp4'
    }
];
Now let's add react component to show the Album in the Music Player:
import { Container, Text, Image } from "@react-three/uikit";
import { Album } from "./Albums";
import { ComponentPropsWithoutRef } from "react";
import { colors } from "../theme";

export function AlbumArtwork({
  album,
  aspectRatio = "portrait",
  width,
  height,
  ...props
}: {
  album: Album;
  aspectRatio?: "portrait" | "square";
} & Omit<ComponentPropsWithoutRef<typeof Container>, "aspectRatio">) {
  return (
    <Container
      flexShrink={0}
      flexDirection="column"
      gap={12}
      {...props}
      padding={10}
    >
      <Image
        borderRadius={6}
        src={album.cover}
        width={width}
        height={height}
        objectFit="cover"
        aspectRatio={aspectRatio === "portrait" ? 3 / 4 : 1}
      />
      <Container
        flexDirection="column"
        gap={4}
        justifyContent="center"
        alignItems="center"
      >
        <Text fontWeight="medium" fontSize={8} lineHeight="100%">
          {album.name}
        </Text>
        <Text fontSize={8} lineHeight={16} color={colors.mutedForeground}>
          {album.artist}
        </Text>
      </Container>
    </Container>
  );
}
Now we can create a scrollable container in the music player to show the albums. Here we also create a function to open a new window for the selected album.
const AlbumsList: React.FC = ({albums}) => {
    const selectAlbum = (album: Album) => {
        createWindow(AlbumWindow, {
            title: album.name,
            props: { album: album },
            width: 100,
            height: 100,
        });
    };
    return (
        <Card
        marginTop={75}
        paddingLeft={10}
        width="100%"
        height={185}
        justifyContent="center"
        flexDirection="column"
      >
        <Container
          paddingBottom={12}
          scrollbarOpacity={0.5}
          scrollbarWidth={2}
          scrollbarColor={colors.mutedForeground}
          ref={abumConRef}
          width={600}
          height={200}
          alignItems="auto"
          justifyContent="flex-start"
          flexDirection="row"
          overflow="scroll"
        >
          {albums.map((album) => (
            <AlbumArtwork
              key={album.name}
              album={album}
              width={100}
              height={100}
              onClick={(e: any) => {
                e.stopPropagation();
                selectAlbum(album);
              }}
            />
    );
};
Now let's modify the MusicPlayer to Include it.
const MusicPlayer: React.FC = () => {
    return (
        <Container>
            <Text>Music Player</Text>
            <AlbumsList albums={albums} />
        </Container>
    );
};
Next we need to create the Album Window.
const AlbumWindow: React.FC = ({album}) => {
    const videoRef = useRef<HTMLVideoElement>(null);
    return (
        <Container
        marginTop={55}
        margin="auto"
        width={150}
        height="100%"
        justifyContent="center"
        alignItems="center"
      >
          <Video
            key={album.name}
            src={album.video}
            width="100%"
            height="75%"
            objectFit="cover"
            borderRadius={10}
            autoplay
            loop
            ref={videoRef}
          />

      </Container>
    );
};
Now in this setup, you can see the album list in the music player and when you click on an album, it opens a new window with the album video. The issue will be UX wise is that a new window will open and play for all the albums. We need to create a new window for the music player and add the album list to it.
In the example you can see how we used a central store for that, and allowed multiple windows but only one to play. That is beyond the scope of this basic Music Player Tutorial. But you can see in the example repo how we handled that and look at more advanced usages for over riding the UI and creating custom windows.
Feel free to checkout the example repo for more details.
Otherwise you can checkout some of the more advanced topics: